Sweet Blooms Calendar Anniversary Card
Hi Crafting Friend,
I still have a few calendars with self-adhesive strips left over from the bunch that I ordered in January from Vippies.com. They measure 2 7/8" X 2 1/4." You can also get similar ones from Amazon. I like using them for anniversary cards because I can circle the date, and the recipient has something they can use for the rest of the year.
Here's how it was made. . .
CARD BASE:
- Wild Wheat cardstock - 5 1/2" X 8 1/2" score, fold and burnish at 4 1/4" on the long side. Cut another piece of cardstock 5 1/2" X 3" score at 1/2"(valley fold), 1 1/2" (mountain fold) and 2 1/2" (valley fold) It will look like a "W" when finished. Adhere the outside of the 1/2" portions to the inside, front and back of the card, keeping the folds flush with the bottom of the card. This provides a stable base to display the card.
- Basic White cardstock - 5 1/4" X 4" Adhere to the back of the card base so you have a place to write your message.
- DSP layer - 5 1/4" X 4"
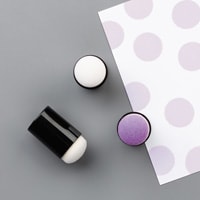
- Basic White cardstock - 4" X 5 1/2" Stamp "lovely" with Tuxedo Black Memento ink and die-cut using Stampin' Cut & Emboss Machine. Die-cut one more and adhere under the first one (with the stamped word) Ink the die-cut word with a Sponge Dauber and Wild Wheat ink. Adhere to the upper right corner of the DSP layer.
- Stamp "hello" & "have a" to the left of "lovely," then stamp "day" below and to the right of the "Y" in "lovely" using Tuxedo Black Memento ink.
- Adhere the DSP layer to the card front, then adhere the calendar to the bottom left of the DSP layer.
Thanks for stopping by MissQsCraftingContinuum, Live Long & Craft On! - Susan 🌄🖖
The stamps and dies used for this card (from the Florals In Bloom Suite) are not available until the 6th of May.
Sweet Blooms Bundle 165189 $51.25 (save 10% over buying individually; stamps 165181 $24, dies 165186 $33)
.JPG)


![Country Woods 12" X 12" (30.5 X 30.5 Cm) Designer Series Paper [ 163393 ] Country Woods 12" X 12" (30.5 X 30.5 Cm) Designer Series Paper [ 163393 ]](https://assets1.tamsnetwork.com/images/EC042017NF/163393s.jpg)
![Wild Wheat 8 1/2" X 11" Cardstock [ 161725 ] Wild Wheat 8 1/2" X 11" Cardstock [ 161725 ]](https://assets1.tamsnetwork.com/images/EC042017NF/161725s.jpg)


![Stampin' Cut & Emboss Machine [ 149653 ] Stampin' Cut & Emboss Machine [ 149653 ]](https://assets1.tamsnetwork.com/images/EC042017NF/149653s.jpg)
![Wild Wheat Classic Stampin' Pad [ 161651 ] Wild Wheat Classic Stampin' Pad [ 161651 ]](https://assets1.tamsnetwork.com/images/EC042017NF/161651s.jpg)
![Clear Block B [ 117147 ] Clear Block B [ 117147 ]](https://assets1.tamsnetwork.com/images/EC042017NF/117147s.jpg)
![Clear Block C [ 118486 ] Clear Block C [ 118486 ]](https://assets1.tamsnetwork.com/images/EC042017NF/118486s.jpg)
![Clear Block E [ 118484 ] Clear Block E [ 118484 ]](https://assets1.tamsnetwork.com/images/EC042017NF/118484s.jpg)


.jpg)
.jpg)
.jpg)
Comments
Post a Comment